Wednesday, May 19, 2010
Sorry for slacking...
You were forewarned, I am a lousy internet guy. I'll try to have some more pictures and info in the course of the next few days.
Thursday, May 6, 2010
Dumping of the bees


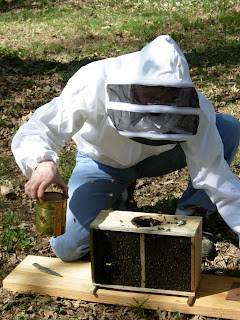
This was April 11th, time to introduce the bees to their new crib. As I opened the box of bees and attempted to remove the queen cage, I discovered the bees had built a bit of comb around it. I found that out just after the queen cage fell into the box of bees. Oh joy. Talk about a introduction to bees, first experience ever and I had to stick my hand in the box of 10,000 to retrieve the queen cage. Honeybees are amazingly mild mannered. I did get stung on the back of the hand once, my fault though. I bumped my hand on the inside of the box and mashed a bee. Rookie mistake. I had a cartoon hand for about three days, all swollen, red, and itchy. It looked like the Hamburger Helper hand, only red. The guys at work thought it was the funniest thing ever. At any rate, the queen was pulled out and placed in the tbh and the rest of the girls got dumped in. A few slow pokes made their way in the front door after a while. I added some grub, and closed it up. It went fairly well for my first time, I thought.
Monday, April 26, 2010
Welcome to bees!

With the queen cage in the box, it was time to pull the sugar syrup can and reach inside after it. What a welcome to the world of bees, my first package and I get to stick my hand in it! It turned out to be pretty cool, the bees were pretty mellow. Except for the one that got bumped between the top of my hand and the inside of the box. Rookie mistake. First sting. I had a cartoon hand for a few days, it was all swollen up. The guys at work thought it was hilarious. My six year old daughter shared some wisdom on the subject of bee stings: "You know dad, that's going to happen if you mess with bees."
Troublemakers

This little piece of comb was constructed by some trouble- maker bees while in transit. They were kind enough to attach it to the queen cage, which then refused to come out of the package as planned. Please disregard the various bee parts in this photo. That was a stunt bee. No actual bees were harmed in the installation of this package.
Finally, some bees...
What's In Your Hive?


It's time for the big day. I go over all my notes and mentally review what the fine folks at Walter T. Kelley told us about installing a package of bees, and despite all of my research, I arrive unprepared. I cannot find one reference to removing the frog from the hive, so I winged it and removed him to a more frog friendly area.
Monday, April 19, 2010
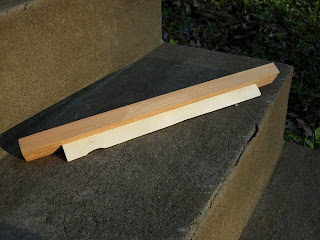
Proprietary secret top bar design
Thursday, April 15, 2010
Inside the hive

For those unfamiliar with top bar hives, this pic shows where the bees build their home. The bars on top of the box are where they build comb and each end is enclosed with a moveable follower board. More top bars are added as additional space is needed. This hive has entrance holes drilled in the side.
Finished summer roof

Here is the finished summer roof. For winter I plan to build a variation based on some ideas from the fine fellows at http://www.customwoodkitsinternational.com/ to deal with any possible condensation issues.
Tuesday, April 13, 2010
Stainless #8 mesh
Finishing touches on TBH #1
Tuesday, April 6, 2010
Top Bar Bees in So IN
Welcome to my new blog! This will probablly be the least updated blog on the internet. It's purpose is to give friends and family a way to track the progress of my first attempt at beekeeping.
Subscribe to:
Comments (Atom)


